

In this post, I’ll teach you how to point your NameCheap Domain to SiteGround. All you need to do is update your DNS NameServers (NS) in your NameCheap control panel so they point to your new SiteGround hosting account. It’s super simple!
If you decided on an alternate domain registrar or hosting service the steps will be similar but please check with your provider for specific instructions.
Amazing WordPress Recommendations
| SiteGround | WordPress Recommended Host |
| NameCheap | Recommended Domain Registrar |
| WP Rocket | The One Plugin I Purchased – Speed Matters! |
| Online WordPress Classes | CreativeLive WordPress Training Classes |

Step 1: Locate your SiteGround NameServer records
To locate your SiteGround NameServer records you will need to go to sign-in to your SiteGround User Area. Click My Accounts tab then below that, Information & Settings tab. From here you will see Account DNS.
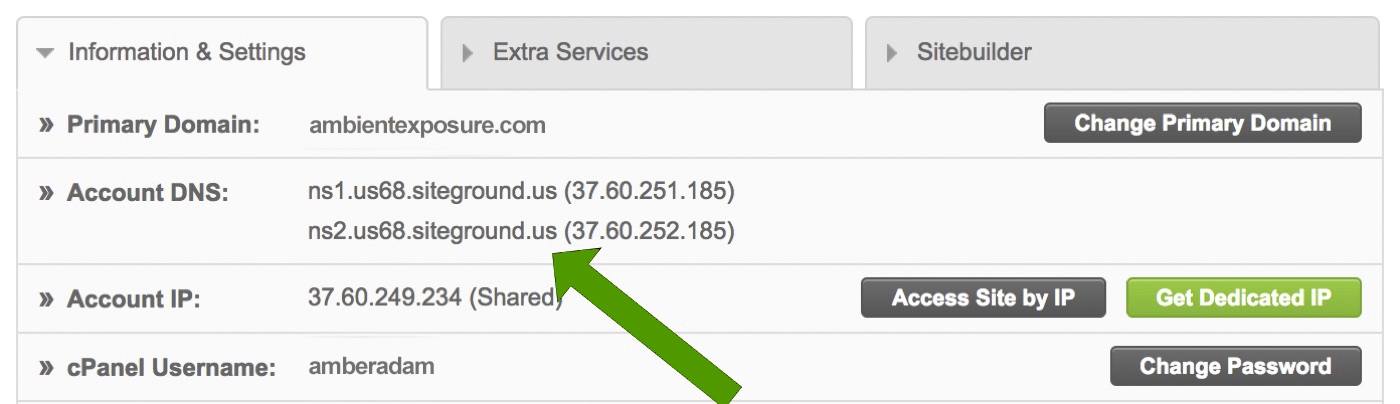
Alternatively, they may have included your NameServers in the email they sent you when you joined. Look for an email titled Important Information about Your New Hosting Account. They look something similar to this.
NS1: ns1.m16.siteground.biz
NS2: ns2.m16.siteground.biz

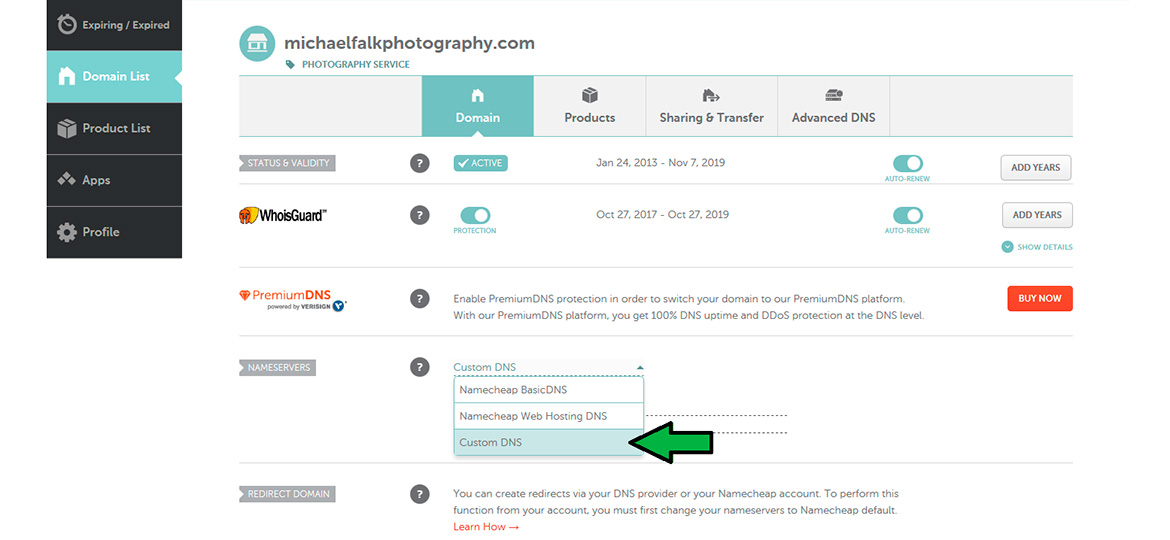
Step 2: Update your NameCheap NameServers
First, sign-in to your NameCheap account. Hover over your account name, top left, and select Dashboard. You should see a list of your domains. Select Manage next to the domain you want to update. Look for the section that says NAMESERVERS.
Currently, it probably says “Namecheap BasicDNS. Select the dropdown arrow and select “Custom DNS”.
Simply enter the two NameServer Records you found in step 1 into the appropriate fields, Nameserver 1 and Nameserver2. Hit the Green Checkmarks to save.
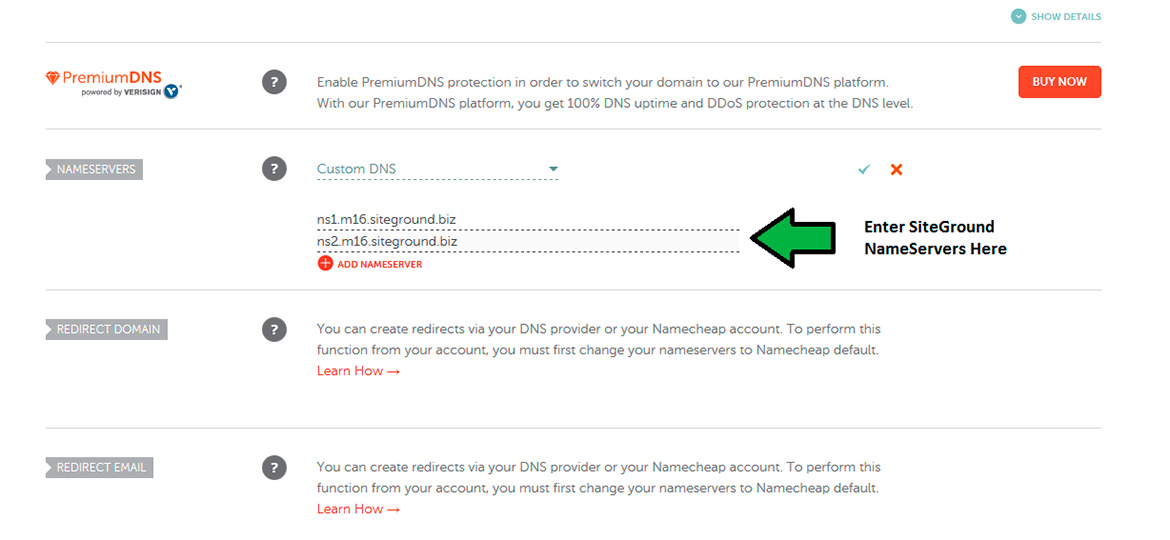
Note: In the email, they are in brackets or have numbers after them. Only enter the part that looks like this: ns1.m16.siteground.biz
That’s it! You’re done.
Please be aware: NameServer changes do not propagate instantly. It may take up to 24 hours for local ISPs to update their DNS caches so that everyone can see your website. From my experience, changes usually only take a couple of hours or less to update.
You can check your NameServers anytime by going here: https://dnschecker.org/ns-lookup.php
Simply enter the domain to see what NameServers are currently being used.
Get inspired and start a blog with up to 99% off at Namecheap!![]()
Did this help you Point a NameCheap Domain to SiteGround Hosting?
Tell us about your experience in the comments below. If not, tell me what I can do better. Thanks!
Next Post: How to Install WordPress on SiteGround
Best Books on WordPress and Blogging
Join the Tribe
Want to join an amazing tribe of photographers, artists, and other creatives? Want more NFT Tips? Check out our Facebook group, NFT Photography Community. The Goal: Let’s just all help each other out!
Also, don’t forget to jump on the email list to get some free Photoshop Overlays and my “very occasional” email. I want to talk with you about inspiration, photography, blogging and just staying motivated.


[…] Post: How to Point a NameCheap Domain to SiteGround Hosting – If you decided on an alternate domain registrar or hosting service the steps will be […]